| 일 | 월 | 화 | 수 | 목 | 금 | 토 |
|---|---|---|---|---|---|---|
| 1 | 2 | 3 | 4 | 5 | 6 | 7 |
| 8 | 9 | 10 | 11 | 12 | 13 | 14 |
| 15 | 16 | 17 | 18 | 19 | 20 | 21 |
| 22 | 23 | 24 | 25 | 26 | 27 | 28 |
- 멋사10기
- 멋쟁이 사자처럼
- 멋사12
- 멋쟁이사자처럼
- 깃허브
- 멋사 합격
- ㅏㄴ
- 알림봇
- 멋사 서류평가
- 멋쟁이사자처럼11기
- 멋사11기
- API
- 파이썬
- 멋사 면접
- 웹동아리
- 멋사 10기
- 멋쟁이사자처럼10기
- 파이썬 크롤링
- 크롤링
- discord
- IT동아리
- 멋사 서류
- django
- 기사 제목 크롤링
- 멋쟁이사자처럼대학
- 멋쟁이사자처럼 서류
- 디스코드봇
- 멋사
- 코딩동아리
- 백엔드
- Today
- Total
ACHO.pk devlog
[Springboot] 등록 상품 메인 화면에서 보기 / 상품 상세 페이지 본문
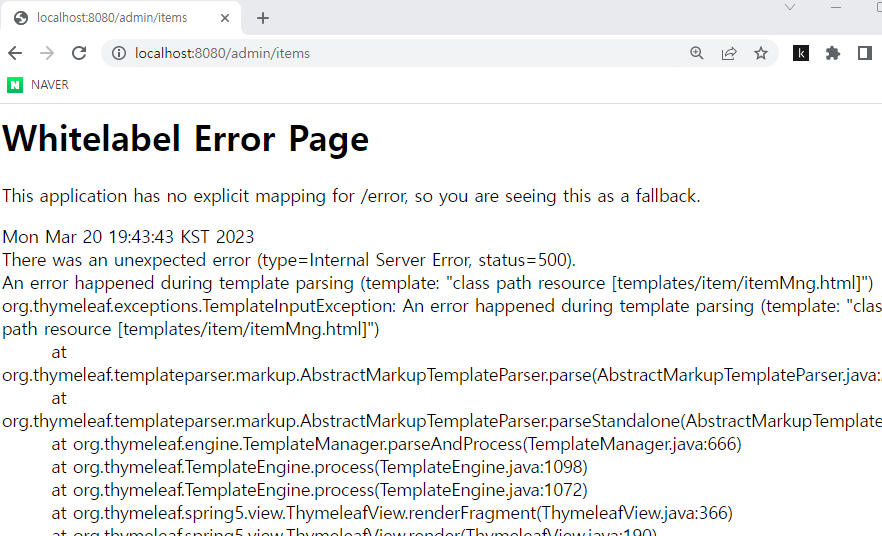
현재 상품 관리 페이지로 가면 볼 수 있는 화면이다. 렌더링이 안되는 것 같은데 이유를 모르겠다.

1. 메인화면
search 버튼을 이용하여 상품명으로 검색이 가능하도록 구현해보자.
Querydsl을 이용하여 상품 조회 시 결과 값을 받을 때 Item 객체로 반환값을 받았다면, 이번엔 @QueryProjection을 이용하여 상품 조회 시 DTO 객체로 결과 값을 받는 방법을 알아보자.
@QueryProjection을 이용하면 item 객체로 값을 받은 후 DTO 클래스로 변환하는 과정 없이 바로 DTO 객체를 뽑아낼 수 있다.
dto > MainItemDto
package com.shop.shop.dto;

import com.querydsl.core.annotations.QueryProjection;
import lombok.Getter;
import lombok.Setter;

@Getter
@Setter
public class MainItemDto {

    private Long id;

    private String itemNm;

    private String itemDetail;

    private String imgUrl;

    private Integer price;

    @QueryProjection
    public MainItemDto(Long id, String itemNm, String itemDetail, String imgUrl,Integer price){
        this.id = id;
        this.itemNm = itemNm;
        this.itemDetail = itemDetail;
        this.imgUrl = imgUrl;
        this.price = price;
    }

}
▹생성자에 @QueryProjection 어노테이션을 선언하여 Querydsl로 결과 조회 시 MainItemDto 객체로 바로 받아오도록 활용한다.
@QueryProjection
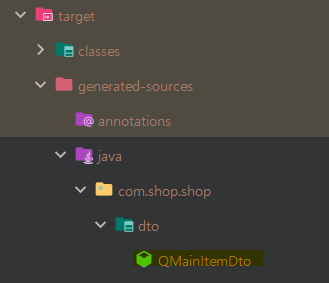
@QueryProjection을 사용하려면 [maven compile]을 실행해 QDto 파일을 생성해야 한다.

컴파일 결과 QMainItemDto가 생성된 것을 확인할 수 있다.

1-1. 사용자 정의 인터페이스
ItemRepositoryCustom 클래스에 메인 페이지에 보여줄 상품 리스트를 가져오는 메소드를 생성한다.
repository > ItemRepositoryCustom
package com.shop.shop.repository;


import com.shop.shop.dto.ItemSearchDto;
import com.shop.shop.dto.MainItemDto;
import com.shop.shop.entity.Item;
import org.springframework.data.domain.Page;
import org.springframework.data.domain.Pageable;

public interface ItemRepositoryCustom {
    Page<Item> getAdminItemPage(ItemSearchDto itemSearchDto, Pageable pageable);

    Page<MainItemDto> getMainItemPage(ItemSearchDto itemSearchDto, Pageable pageable);
}
getMainItemPage() 메소드를 ItemRepositoryCustomImpl 클래스에 구현한다.
repository > ItemRepositoryCustomImpl
package com.shop.shop.repository;

import com.querydsl.core.QueryResults;
import com.querydsl.core.types.dsl.BooleanExpression;
import com.querydsl.jpa.impl.JPAQueryFactory;
import com.shop.shop.constant.ItemSellStatus;
import com.shop.shop.dto.ItemSearchDto;
import com.shop.shop.dto.MainItemDto;
import com.shop.shop.dto.QMainItemDto;
import com.shop.shop.entity.Item;
import com.shop.shop.entity.QItem;
import com.shop.shop.entity.QItemImg;
import org.springframework.data.domain.Page;
import org.springframework.data.domain.PageImpl;
import org.springframework.data.domain.Pageable;
import org.thymeleaf.util.StringUtils;

import javax.persistence.EntityManager;
import java.time.LocalDateTime;
import java.util.List;

public class ItemRepositoryCustomImpl implements ItemRepositoryCustom {

    ...생략...

    private BooleanExpression itemNmLike(String searchQuery) {
        return StringUtils.isEmpty(searchQuery) ? null : QItem.item.itemNm.like("%" + searchQuery + "%");
    }

    @Override
    public Page<MainItemDto> getMainItemPage(ItemSearchDto itemSearchDto, Pageable pageable) {
        QItem item = QItem.item;
        QItemImg itemImg = QItemImg.itemImg;

        QueryResults<MainItemDto> results = queryFactory
                .select(
                        new QMainItemDto(
                                item.id,
                                item.itemNm,
                                item.itemDetail,
                                itemImg.imgUrl,
                                item.price)
                )
                .from(itemImg)
                .join(itemImg.item, item)
                .where(itemImg.repimgYn.eq("Y"))
                .where(itemNmLike(itemSearchDto.getSearchQuery()))
                .orderBy(item.id.desc())
                .offset(pageable.getOffset())
                .limit(pageable.getPageSize())
                .fetchResults();

        List<MainItemDto> content = results.getResults();
        long total = results.getTotal();
        return new PageImpl<>(content, pageable, total);

    }
}
▹검색어가 null이 아니면 상품명에 해당 검색어가 포함되는 상품을 조회하는 조건을 반환한다.
private BooleanExpression itemNmLike(String searchQuery) {
▹QMainItemDto의 생성장에 반환할 값들을 넣어준다. @QueryProjection을 사용하면 DTO로 바로 조회가 가능하다. 엔티티 조회 후 DTO로 변환하는 과정을 줄일 수 있다.
new QMainItemDto(
▹itemImg오 item을 내부 조인한다.
.join(itemImg.item, item)
▹상품 이미지의 경우 대표 상품 이미지만 불러온다.
.where(itemImg.repimgYn.eq("Y"))
1-2. 메인페이지 상품 데이터 조회
service > ItemService
▹메인 페이지 보여줄 상품 데이터를 조회하는 코드이다.
package com.shop.shop.service;


import com.shop.shop.dto.ItemFormDto;
import com.shop.shop.dto.ItemImgDto;
import com.shop.shop.dto.ItemSearchDto;
import com.shop.shop.dto.MainItemDto;
import com.shop.shop.entity.Item;
import com.shop.shop.entity.ItemImg;
import com.shop.shop.repository.ItemImgRepository;
import com.shop.shop.repository.ItemRepository;
import lombok.RequiredArgsConstructor;
import org.springframework.stereotype.Service;
import org.springframework.web.multipart.MultipartFile;


import org.springframework.data.domain.Page;
import org.springframework.data.domain.Pageable;

import javax.persistence.EntityNotFoundException;
import org.springframework.transaction.annotation.Transactional;
import java.util.ArrayList;
import java.util.List;

@Service
@Transactional
@RequiredArgsConstructor
public class ItemService {
   ...생략...

    @Transactional(readOnly = true)
    public Page<MainItemDto> getMainItemPage(ItemSearchDto itemSearchDto, Pageable pageable){
        return itemRepository.getMainItemPage(itemSearchDto, pageable);
    }
}
controller > MainController
▹메인 페이지에 상품 데이터를 보여주기 위한 코드이다.
package com.shop.shop.controller;

import com.shop.shop.dto.ItemSearchDto;
import com.shop.shop.dto.MainItemDto;
import com.shop.shop.service.ItemService;
import lombok.RequiredArgsConstructor;
import org.springframework.data.domain.Page;
import org.springframework.data.domain.PageRequest;
import org.springframework.data.domain.Pageable;
import org.springframework.stereotype.Controller;
import org.springframework.ui.Model;
import org.springframework.web.bind.annotation.GetMapping;

import java.util.Optional;

@Controller
@RequiredArgsConstructor
public class MainController {

    private final ItemService itemService;

    @GetMapping(value = "/")
    public String main(ItemSearchDto itemSearchDto, Optional<Integer> page, Model model){

        Pageable pageable = PageRequest.of(page.isPresent() ? page.get() : 0, 6);
        Page<MainItemDto> items = itemService.getMainItemPage(itemSearchDto, pageable);

        model.addAttribute("items", items);
        model.addAttribute("itemSearchDto", itemSearchDto);
        model.addAttribute("maxPage", 5);

        return "main";
    }
}
main 페이지를 수정해서 페인페이지에 상품 데이터를 보여주도록 해보자.
templates > main.html
아래 링크에서 가져오면 된다.
https://github.com/roadbook2/shop/blob/master/src/main/resources/templates/main.html
▹부트스트랩의 슬라이드를 보여주는 Carousel 컴포넌트를 이용하여 배너를 만들었다. 쇼핑몰의 경우 보통 현재 행사 중인 상품을 광고하는 데 사용한다.
<div id="carouselControls" class="carousel slide margin" data-ride="carousel">
▹이미지 태그의 src 속성에는 웹상에 존재하는 이미지 경로를 넣어주면 해당 이미지를 보여준다.
<img class="d-block w-100 banner" src="https://user-images.githubusercontent.com/13268420/112147492-1ab76200-8c20-11eb-8649-3d2f282c3c02.png" alt="First slide">
▹쇼핑몰 오른쪽 상단의 Search 기능을 이용해서 상품을 검색할 때 페이징 처리 시 해당 검색어를 유지하기 위해서 hidden 값으로 검색어를 유지한다.
<input type="hidden" name="searchQuery" th:value="${itemSearchDto.searchQuery}">
▹상품을 검색했을 때 어떤 검색어로 조회된 결과인지를 보여준다.
<p class="h3 font-weight-bold" th:text="${itemSearchDto.searchQuery} + '검색 결과'"></p>
▹조회한 메인 상품 데이터를 보여준다. 부트스트랩의 Card 컴포넌트를 이용했고, 사용자가 카드 형태로 상품의 이름, 내용, 가격을 볼 수 있다.
<th:block th:each="item, status: ${items.getContent()}">
데이터베이스가 계속 충돌한다는 에러가 떠서 아래 블로그 참고했다.
https://engkimbs.tistory.com/794
[Spring Boot #25] 스프링 부트 데이터베이스 초기화
이전 포스팅에서 쓰던 테스트 및 소스 코드를 사용합니다. [Spring/Spring Boot] - [Spring Boot #24] 스프링 부트 Spring-Data-JPA 연동 | 스프링 부트 데이터베이스 초기화 실제 인메모리 DB가 아닌 일반 디스크
engkimbs.tistory.com
메인 페이지 구현 완료

2. 상품 상세 페이지
상세 페이지로 이동할 수 있도록 ItemController 클래스에 코드를 추가한다. 기존에 상품 수정 페이지 구현에서 미리 만들어둔 상품을 가지고 오는 로직을 똑같이 사용한다.
controller > ItemController
package com.shop.shop.controller;

import com.shop.shop.dto.ItemFormDto;
import com.shop.shop.dto.ItemSearchDto;
import com.shop.shop.entity.Item;
import com.shop.shop.service.ItemService;
import lombok.RequiredArgsConstructor;
import org.springframework.stereotype.Controller;
import org.springframework.ui.Model;
import org.springframework.validation.BindingResult;
import org.springframework.web.bind.annotation.GetMapping;
import org.springframework.web.bind.annotation.PathVariable;
import org.springframework.web.bind.annotation.PostMapping;
import org.springframework.web.bind.annotation.RequestParam;
import org.springframework.web.multipart.MultipartFile;

import org.springframework.data.domain.Page;
import org.springframework.data.domain.PageRequest;
import org.springframework.data.domain.Pageable;

import javax.persistence.EntityNotFoundException;
import javax.validation.Valid;
import java.util.List;
import java.util.Optional;

@Controller
@RequiredArgsConstructor
public class ItemController {
    ...생략...

    @GetMapping(value = "/item/{itemId}")
    public String itemDtl(Model model, @PathVariable("itemId") Long itemId){
        ItemFormDto itemFormDto = itemService.getItemDtl(itemId);
        model.addAttribute("item", itemFormDto);
        return "item/itemDtl";
    }

}
다음으로 상품 상세 페이지를 만들어보자.
templates > item > itemDtl.html
코드는 아래 링크에서 가져오면 된다.
https://github.com/roadbook2/shop/blob/master/src/main/resources/templates/item/itemDtl.html
▹현재 주문할 수량과 상품 한 개당 가격을 곱해서 결제 금액을 구해주는 함수이다.
function calculateToalPrice(){
▹등록된 상품 이미지를 반복 구문을 통해 보여주고 있다. 보통 실제 쇼핑몰에서는 상품에 대한 정보를 예쁘게 이미지로 만들어서 보여준다.
<div th:each="itemImg : ${item.itemImgDtoList}" class="text-center">
상품 상세 페이지도 구현이 완료되었다.

'프레임워크 > Springboot' 카테고리의 다른 글
| [Springboot] 주문 이력 조회 및 주문 취소하기 (0) | 2023.03.21 |
|---|---|
| [Springboot] 상품 주문 기능 구현하기 (0) | 2023.03.20 |
| [Springboot] 상품 관리하기 (2) | 2023.03.14 |
| [Springboot] 상품 수정하기 (0) | 2023.03.13 |
| [Springboot] 상품 등록하기 (0) | 2023.03.12 |


